Using Ansible
An Ansible playbook can be used to configure and manage a full node.
An Ansible playbook can be used to configure and manage a full node.
Prerequisites
- Install Ansible on your local machine with Python3.x. The setup doesn't run on Python 2.x.
- To install Ansible with Python 3.x, you can use pip. If you do not have pip on your machine,
follow the steps outlined here. Run
pip3 install ansibleto install Ansible.
- To install Ansible with Python 3.x, you can use pip. If you do not have pip on your machine,
follow the steps outlined here. Run
- Check the Polygon PoS Ansible repository for requirements.
- You also need to ensure that Go is not installed in your environment. You will run into issues if you attempt to set up your full node through Ansible with Go installed as Ansible requires specific packages of Go.
- You will also need to make sure that your VM / Machine does not have any previous setups for Polygon Validator or Heimdall or Bor. You will need to delete them as your setup will run into issues.
Full node setup
-
Ensure you have access to the remote machine or VM on which the full node is being set up.
Refer to https://github.com/0xPolygon/node-ansible for more details.
-
Clone the https://github.com/0xPolygon/node-ansible repository.
-
Navigate into the node-ansible folder:
cd node-ansible -
Edit the
inventory.ymlfile and insert your IP(s) in thesentry->hostssection.Refer to https://github.com/0xPolygon/node-ansible#inventory for more details.
-
Check if the remote machine is reachable by running:
ansible sentry -m ping -
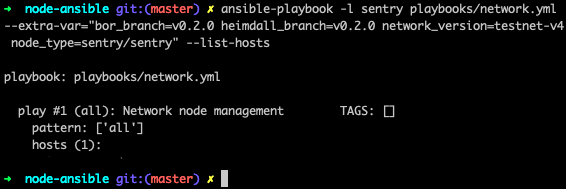
To test if the correct machine is configured, run the following command:
# Mainnet:
ansible-playbook playbooks/network.yml --extra-var="bor_version=v1.0.0 heimdall_version=v1.0.3 network=mainnet node_type=sentry" --list-hosts

# Testnet:
ansible-playbook playbooks/network.yml --extra-var="bor_version=v1.1.0 heimdall_version=v1.0.3 network=amoy node_type=sentry" --list-hosts
-
Next, set up the full node with this command:
# Mainnet: ansible-playbook playbooks/network.yml --extra-var="bor_version=v1.1.0 heimdall_version=v1.0.3 network=mainnet node_type=sentry" # Testnet: ansible-playbook playbooks/network.yml --extra-var="bor_version=v1.0.0 heimdall_version=v1.0.3 network=amoy node_type=sentry" -
In case you run into any issues, delete and clean the whole setup using:
ansible-playbook playbooks/clean.yml -
Once you initiate the Ansible playbook, log in to the remote machine.
-
Please ensure that the value of seeds and bootnodes mentioned here is the same value as mentioned in Heimdall and Bor
config.tomlfiles. If not, change the values accordingly. -
To check if Heimdall is synced
- On the remote machine/VM, run
curl localhost:26657/status - In the output,
catching_upvalue should befalse
- On the remote machine/VM, run
-
Once Heimdall is synced, run:
sudo service bor start
If you've reached this point, you have successfully set up a full node with Ansible.
If Bor presents an error of permission to data, run this command to make the Bor user the owner of the Bor files:
sudo chown bor /var/lib/borLogs
Logs can be managed by the journalctl linux tool. Here is a tutorial for advanced usage: How To Use Journalctl to View and Manipulate Systemd Logs.
Check Heimdall node logs
journalctl -u heimdalld.service -fCheck Bor node logs
journalctl -u bor.service -fLast updated on